How to set up TikTok Ads Manager, Business Center, Pixel and Events API from zero
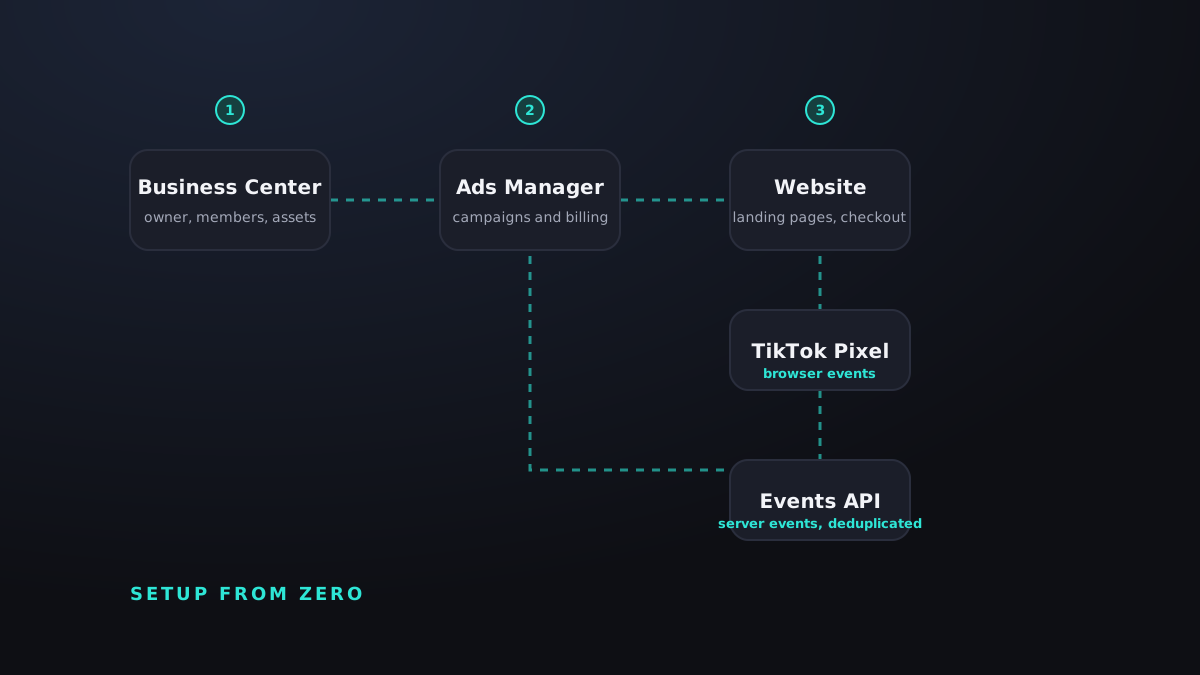
Most tracking problems we are asked to fix were born on day one, when someone opened an ad account under a personal login and added a Pixel from the wrong place. The fix later costs weeks. This guide gives the order of operations we use for every new client, from an empty browser tab to a verified setup that is ready to spend. It assumes you have a registered business, a website you control and a payment method in the company's name.
Why the order matters
TikTok's advertising tools sit in a hierarchy. Business Center owns assets: ad accounts, Pixels, catalogs, TikTok accounts and the people who can access them. Ads Manager is where campaigns are built and billed. The Pixel and the Events API are how your website tells TikTok what happened after the click. If you create these in the wrong order you end up with an ad account that belongs to an employee, a Pixel that belongs to an agency, or a Shop registered to the wrong legal entity. Each is fixable, but each takes time and sometimes a support ticket. Build from the top down and you avoid all of it.
Step 1: Create Business Center in the company's name
Go to TikTok for Business and create a Business Center using a company email address that more than one person can access, not a personal account. Enter the legal business name exactly as it appears on your registration documents, because you will be asked to verify it later. Assign at least two admins from your own company, so that a departure or a lost phone does not lock you out. Then invite partners, such as an agency, through the Partners section with the specific permissions they need. Partners should never be owners.
Inside Business Center, connect your organic TikTok account, the one you post from, as an asset. This is what allows Spark Ads later, and it is easier to do now than to untangle after an agency has linked it somewhere else. If you sell physical products, this is also the moment to start TikTok Shop registration under the same entity, since Shop approval runs on its own clock.
Step 2: Ads Manager account, billing and verification
From Business Center, create a new ad account rather than claiming an existing one. Set the currency, time zone and billing country carefully. They cannot be changed after the fact, and the time zone determines how daily budgets and reports are cut. Add a payment method in the company's name. Many accounts stall at business verification: have your registration documents, EIN letter and a matching website ready, and make sure the business name, address and domain tell the same story. Verification unlocks higher spending limits, and features such as lead generation instant forms and Shop ads may check for it.
While you are there, enable two-factor authentication for every user and write down the ad account ID, the Business Center ID and the admin emails in a document your company controls. This handover sheet matters the first time someone asks who owns what, and it is the document you will hand to any future agency.
Step 3: Create the TikTok Pixel and define events
Open Events in Ads Manager, create a web Pixel under the Business Center and name it after the website it will live on. Choose the manual installation path if you want control; the partner integrations for Shopify, WooCommerce and other platforms are fine when they match your store and are kept up to date.
Decide the events before you install anything. For e-commerce: ViewContent, AddToCart, InitiateCheckout and CompletePayment, each with value and currency parameters. For lead generation: ViewContent on key pages, SubmitForm or CompleteRegistration for the lead, and a custom event for a qualified lead if your CRM can report it back. For apps, the app events integration or a mobile measurement partner replaces the web Pixel. A short list of well-defined events beats a long list that nobody trusts. Turn on advanced matching so that hashed email and phone data improve match rates, and make sure your privacy policy and consent handling cover that use.
Step 4: Add the Events API and deduplicate
Browser Pixels miss a share of events because of ad blockers, privacy features and slow pages. The Events API sends the same events from your server directly to TikTok. Implement it through your platform's native integration, through a tag manager with a server-side container, or directly against the API with an access token generated in Events Manager.
The step people skip is deduplication. Every event should carry an event ID that is identical in the browser call and in the server call, so TikTok counts it once. Include the click identifier that TikTok appends to your landing page URL and the Pixel cookie value in server events to improve attribution. Then compare the two sources in Events Manager. If the server is sending far more events than the browser, you are probably missing deduplication; if far fewer, the server integration is dropping events or firing on the wrong condition.
Step 5: Verify before you spend
Install the TikTok Pixel Helper browser extension and walk through your site as a customer would, on desktop and on a phone. Confirm each event fires once, with the right parameters, and that the Events API shows matching counts in Events Manager with a high deduplication rate. Use Test Events to watch them arrive in real time. Then check that GA4 records the same journey, so you have an independent reference when the numbers disagree later.
Only when the test events look right should the first campaign go live, and even then the first week is a measurement week as much as a performance week. TikTok publishes documentation for every step in its Business Help Center at ads.tiktok.com/help, and the interface changes often enough that it is worth checking there when a screen does not match a guide, including this one.
If you would rather hand this to a team that has done it many times, our account setup service covers Business Center, Ads Manager, Pixel, Events API, GA4 and Shop, all in your name and documented. Tell us where you are starting from on our contact page.